Pavtube FLV/F4V Converter
Pavtube CUDA FLV Converter now can convert all encoded FLV/F4V videos to other video formats like MOV, MP4, MKV, WMV, AVI, DVD, VCD, SVCD, FLV (Sorenson H.263), FLV (H.264), SWF etc with ease.Convert FLV to iPod Nano
Intruduction of iPod Nano:
iPod Nano is the most popular music player in the world which lets you enjoy TV shows, movies, video podcasts, and more.
Audio: MP3, WAV, AMV, WMA.
Video: MP4
This tutorial is telling you how to convert FLV to the formats acceptable to your iPod Nano, so that you can enjoy the FLV anytime anywhere.
Moyea FLV to Video Converter Pro 2 is an easy-to-use converter that lets you enjoy the videos on YouTube, Google, MySpace and other websites on your iPod Nano. You can see how Moyea FLV to Video Converter Pro 2 converts FLV to MP4 for you below.
Download Moyea FLV to Video Converter and initiate it.
1. Import FLV files
Click “Add FLV” icon in the top menu to import the FLV file on your computer, and it will play in the right preview window automatically.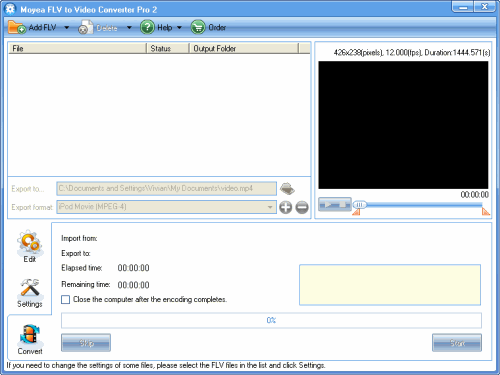
2. Edit settings
If you don’t want to edit the video or get special effects, skip this step and go to step 3 directly.
In “Clip” tab, you can crop and trim the video for cutting off the black edges and reducing the video duration. You can choose to drag or set the precise values to complete cropping or trimming.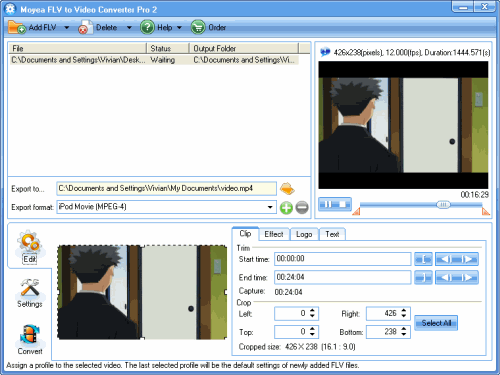
More bonuses you can get in this step, such as image watermark, text watermark, and video effects.
Choose Logo > Add image watermark, import a picture from your computer as watermark.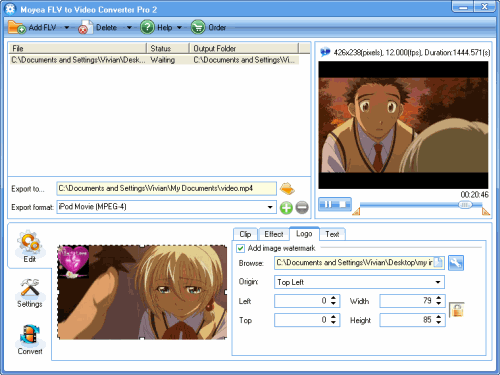
Set the watermark position by selecting from the “Origin” drop-down list or set the offset parameters precisely. You can also set the transparence of the watermark to get better effects by clicking wrench icon. Select a pixel as transparent color, or directly set the RGB of the color, drag the tolerance bar to eliminate the color within the tolerance scale, and drag the alpha bar to get better effects. So you can put a harmonious watermark with the video.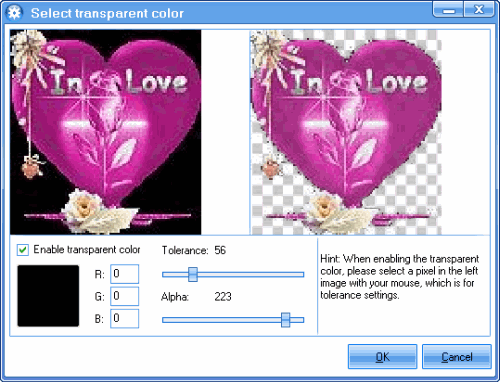
Choose Text and write anything you like in the caption dialog, the text will be added to your video, you can preview the effects in the left pane.
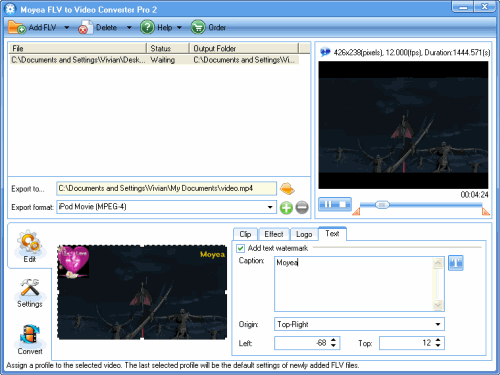
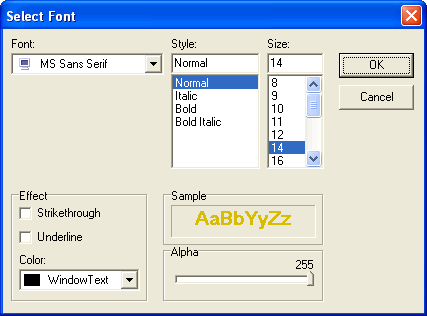
Set the text position by selecting from the “Origin” drop-down list, or set the offset parameters directly. Click the “T” button, and you can even set the font, style, size and so on in the following dialog.
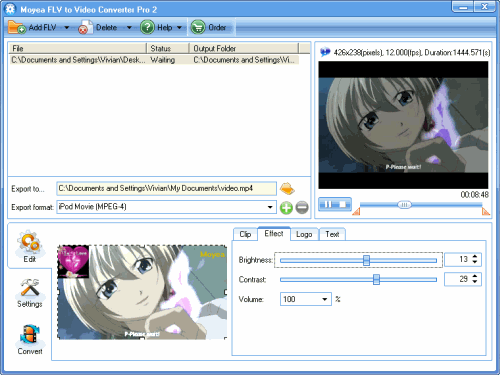
Choose “Effect”, set the brightness, contrast and volume here.
3. Video and audio settings
Click “Settings” icon and set video and audio settings like bit rate, frame rate, video codec, audio codec and so on.
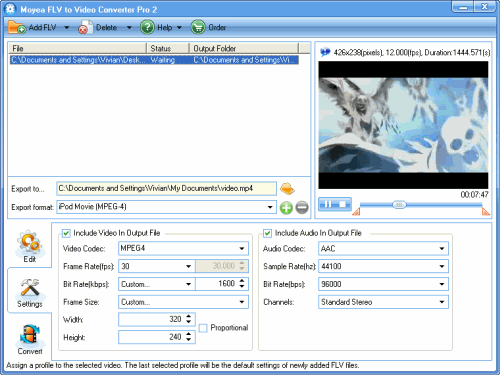
4. Output settings
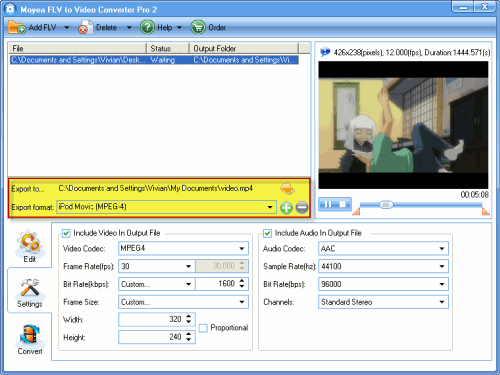
Click the folder button in the middle of the interface to set the destination of the output video. Select iPod video type from the “Export Type” list, for example, iPod Movie (MPEG-4).
5. Convert
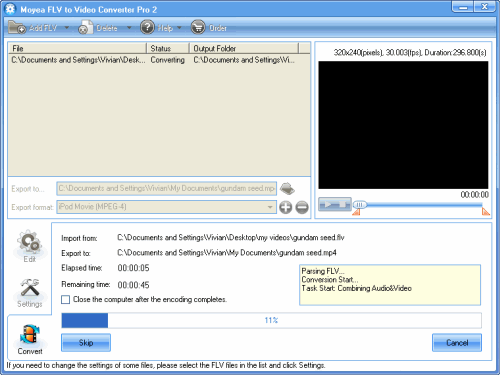
Click the “Convert” icon. You can specify one file or choose all of the files to convert one after another. This process will be completed quickly. At last, you can sync the converted videos to your iPod with iTunes, and enjoy it anywhere anytime.
Tips
- Convert Flash Video FLV from YouTube to WMV for CMD V-85
- How to create FLV Player playlist?
- FLV to iPhone 4 - Convert FLV to iPhone 4 with Best FLV to iPhone 4 Converter
- Best Flash Video Downloader - Capture and save online video to PC
- Extract YouTube Flash Video FLV to mp3 for Creative Zen Neeon 2 MP3 player
- Free Dailymotion Video Downloader - Capture and save videos from Dailymotion
- VP6 Flash Video Converter - Convert VP6 to WMV
- Choose the Right Tool to Record Flash Video Online
- Metacafe Video Downloader - Free download Flash Video from Metacafe
- How to Play F4V and Convert F4V?
 Promotion


