 Promotion


With Flash Video Server, you are able to create virtual hosts with different domain names and provide Flash video playing, publishing, and live video delivering which enables end users to have video blogs, enjoy videos, hold online live video conferences, and so on. Thus the client-side developers must make some client-side consoles for end users. In the previous article, we have mentioned how to make a FLV player for the server. Here, Id like to tell you something about making live and record consoles.
Tools: Macromedia Flash 8, Flash Video Server.
Notes: Readers who plan to follow this passage must have some basic Flash 8 and Action Script knowledge.
First, the simplest way is to create a console without any buttons or text bars, only three steps.
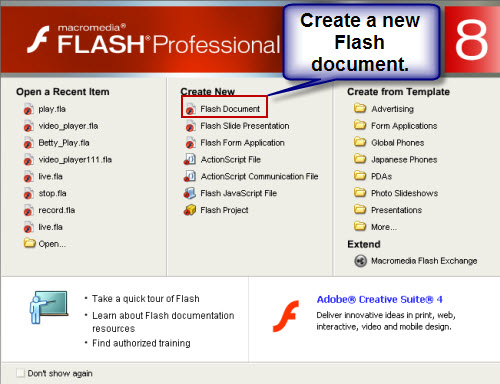
- Launch Flash 8 and create a new Flash document.
- Layout
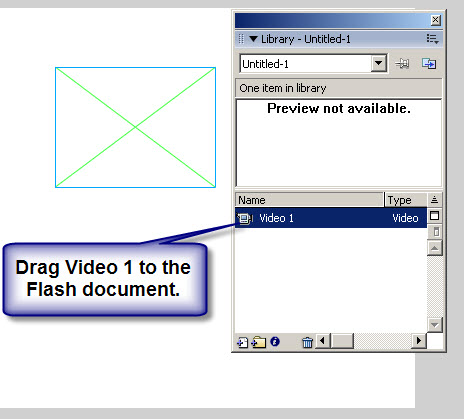
Press Ctrl+L to get the Library window. Right click on the blank area of Name & Type and select New Video Name it in the symbol box and select Video (ActionScript-controlled) before clicking OK. And then, drag it to the Flash document. This is for playing the recorded or live video. Click the Free transform tool on the tools window to resize it.
- Initialization Codes
Once you get the desired size, you can click on the blank area of the Flash document, and copy & paste the following codes to the Action C Frame section.
var nc: NetConnection = new NetConnection();
nc.connect(”rtmp://127.0.0.1/Sample/Sample“);
var ns: NetStream = new NetStream(nc);
video_screen.attachVideo(Camera.get());
ns.attachVideo(Camera.get());
ns.attachAudio(Microphone.get());
ns.publish(”demo“, “record“);
Press Ctrl + Enter on the keyboard, you can test the file. If you have a PC camera, and there is no authorization set to the virtual host, you can record the video from your camera. After recording, an FLV named demo. You can play it with player.swf in sample folder.
If you are creating a live console, just change the record into live, and change the name demo into other names you like. Once testing, a file with the new name will be generated in _data folder. But the file only exists while delivering, once the live console is closed, the file will disappear.
If it tests well, you can click File> Export> Export Movie
Choose the desired location, name the file and press OK.
In the Export Flash Player window, select Access network only in the Local Playback Security menu.
Press OK to confirm and you will get the simple record or live console. Client-side developers can add buttons and text bars to the Flash document and write ActionScript codes to control.
Customize your own Record console:
Download links:
You can download this Record sample here. record_1.fla
You can download this Record console here. record_1.swf
As is stated above, this server is very flexible to client-side developers. Here Id like to provide you a sample that you can follow.
Steps:
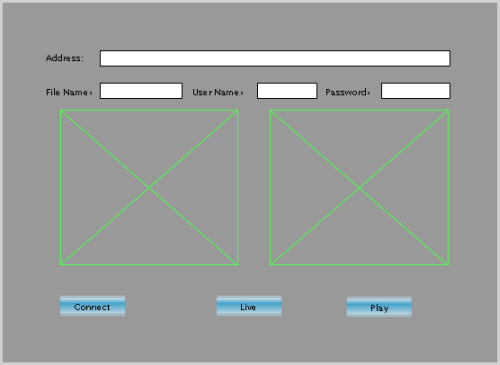
- Preparation: Same with the above steps, you must create a new Flash document, add relative objects and arrange the layout as follows.
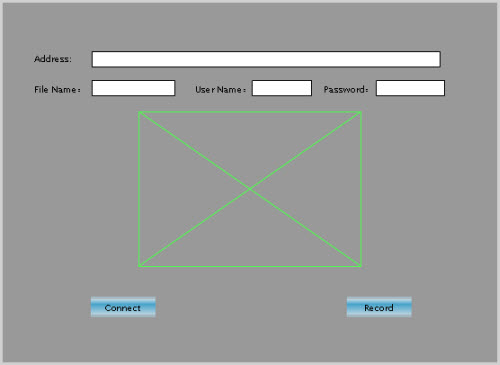
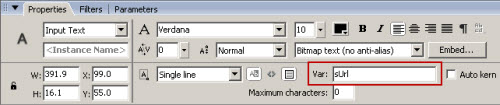
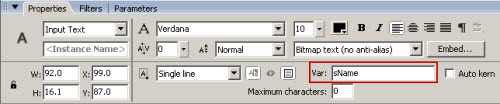
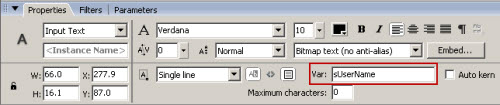
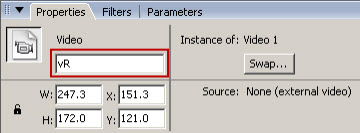
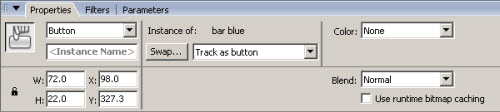
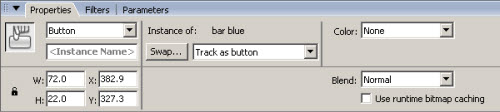
- Name the objects: Select the relative objects and set their parameters as follows.
Address text box:
File Name text box:
User Name text box:
Password text box:

Video screen:
Connect button:
Record button:
- ActionScript Codes
After the above settings, you are able to write the AS codes to control this console.
Initialization codes:
Left click on the blank area of this Flash document, and write the following codes in the Actions- Frame section:
var vNc:NetConnection;
var vNs:NetStream;
sUrl = “”;
sName = “”;
sUserName = “”;
sPassword = “”;
Codes for the buttons:
Click the relative button and write the following codes in the Actions- Button section:
Connect button:
on(press)
{
vNc = new NetConnection();
vNc.onStatus = function(info)
{
trace(info.code);
}
vNc.connect(sUrl, sUserName, sPassword);
}
Record button:
on(press)
{
vNs = new NetStream(vNc);
vNs.onStatus = function(info)
{
trace(info.code);
}
vR.attachVideo(vNs);
vNs.attachVideo(Camera.get());
vNs.attachAudio(Microphone.get());
vNs.publish(sName, “record”);
}
4.Test and output: Press Ctrl + Enter to test this console. If it works well, just click File> Export> Export movie. Select the desired output path and confirm, you will face the Export Flash Player window. Select Access network only in the Local Playback Security menu and press OK to confirm. Now you get the Record console.
Customize your own Live console:
Download links: To download the sample .fla, please click here. live_1.fla
To download the Live console, please click here. live_1.swf
- New document and layout: Create a new Flash document, add the relative objects, and set the layout as follows.
- ActionScript Codes
Initialization codes:
Left click on the blank area of this Flash document, and write the following codes in the Actions- Frame section:
var sNc:NetConnection;
var sNsLive:NetStream;
var sNsPlay:NetStream;
sUrl = “”;
sName = “”;
sUserName = “”;
sPassword = “”;
Codes for the buttons:
Click the relative button and write the following codes in the Actions- Button section:
Connect button:
on(press)
{
vNc = new NetConnection();
vNc.onStatus = function(info)
{
trace(info.code);
}
vNc.connect(sUrl, sUserName, sPassword);
}
Live button:
on(press)
{
sNsLive = new NetStream(vNc);
sNsLive.onStatus = function(info)
{
trace(info.code);
}
vR.attachVideo(vNs);
sNsLive.attachVideo(Camera.get());
sNsLive.attachAudio(Microphone.get());
sNsLive.publish(sName, “live”);
}
Play button:
on(press)
{
sNsPlay = new NetStream(vNc);
sNsPlay.onStatus = function(info)
{
trace(info.code);
}
vP.attachVideo(sNsPlay);
sNsPlay.play(sName);
}
- Test and output: Please refer to step 4 of Record console.
Note: If there is power specified to the record and live function, only authorized users can access this console with user name and password. If not, any one is able to access as guest. This is an outstanding feature which other servers do not have. To know more about the power specification feature, please refer to Moyea Flash Video Server Console Manual.
About the sample:
If you open the live.fla or record.fla in the sample folder of the Flash Video Server, you will find that the codes are very simple. The reason is that most of the codes are written in the SampleAS.as file. You can quote this file to reduce the other complex codes.
In a word, Flash Video Server provides the most flexible choices that you can personalize your own service. Hope you enjoy working with Flash Video Server.
